
Theme Options

Brandberry Admin Panel
Brandberry is designed with a modern, flexible customization workflow. Most visual styling and layout options are handled directly through Elementor Site Settings, giving you full control without touching code.
In addition to Elementor customization, Brandberry includes a dedicated Theme Settings panel for managing global behavior and advanced options. These settings control how the theme works rather than how it looks.
You can access all Brandberry theme settings by navigating to Brandberry Theme → Theme Settings in the WordPress admin area.
From the Theme Settings panel, you can:
- Access Header & Footer Builders
- Style default WordPress pages and layouts
- Enable or disable the demo importer
- Turn on RTL (Right-to-Left) layout support for the frontend
- Manage custom post types and taxonomy options
- Add custom CSS or JavaScript
- Control asset optimization and performance options
- Configure backup and restore options
CPT & Taxonomy Builder
Brandberry includes a powerful built-in Custom Post Type (CPT) & Taxonomy Builder that allows you to create and manage custom content structures without installing additional plugins. These custom post types can be used directly with Brandberry’s Elementor widgets.
Custom Post Types
Custom Post Types allow you to create structured content such as projects, portfolios, services, case studies, or any other content type required by your website.
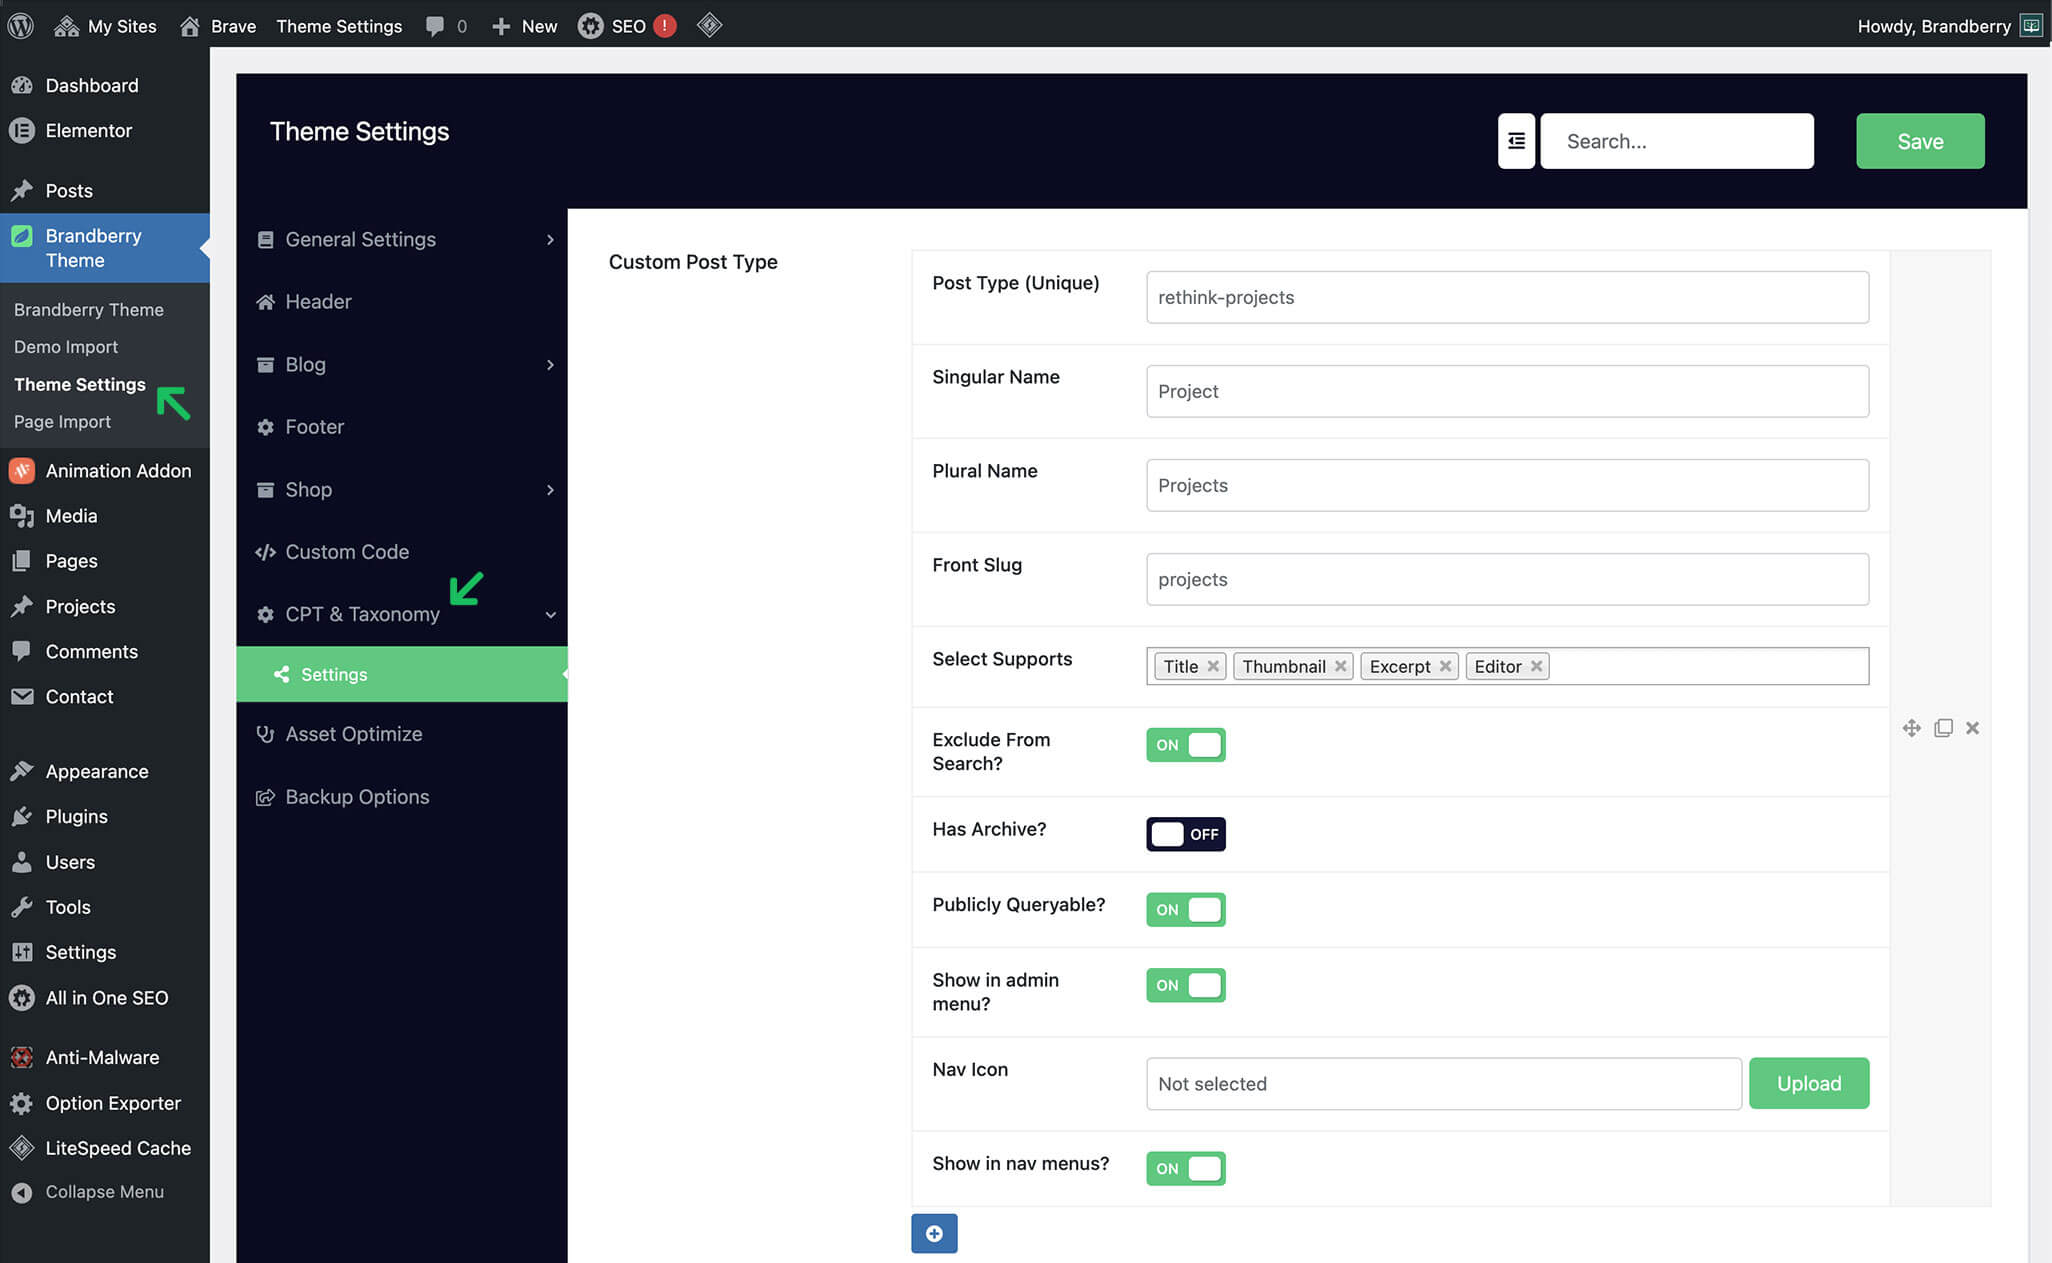
To create a custom post type, navigate to:
Brandberry Theme → Theme Settings → CPT & Taxonomy → Settings
Custom Post Type Options
Each custom post type includes the following configuration options:
- Post Type (Unique)
A unique identifier used internally by WordPress. Must be lowercase and contain no spaces. - Singular Name
The singular label for the post type (for example: Project). - Plural Name
The plural label displayed in the WordPress admin menu. - Front Slug
Defines the URL structure for this post type on the frontend. - Select Supports
Choose which WordPress features are enabled for this post type, such as title, editor, excerpt, and featured image. - Exclude From Search
Prevents this post type from appearing in WordPress search results. - Has Archive
Enables or disables an automatic archive page for the post type. - Publicly Queryable
Allows the post type to be accessed on the frontend. - Show in Admin Menu
Displays the post type in the WordPress admin menu. - Navigation Icon
Upload a custom icon to represent the post type in the admin menu. - Show in Navigation Menus
Allows the post type to be selected when building WordPress menus.
Using Custom Post Types with Elementor
Once created, your custom post types will automatically appear in the WordPress dashboard. You can add new items and design their layout using Elementor.
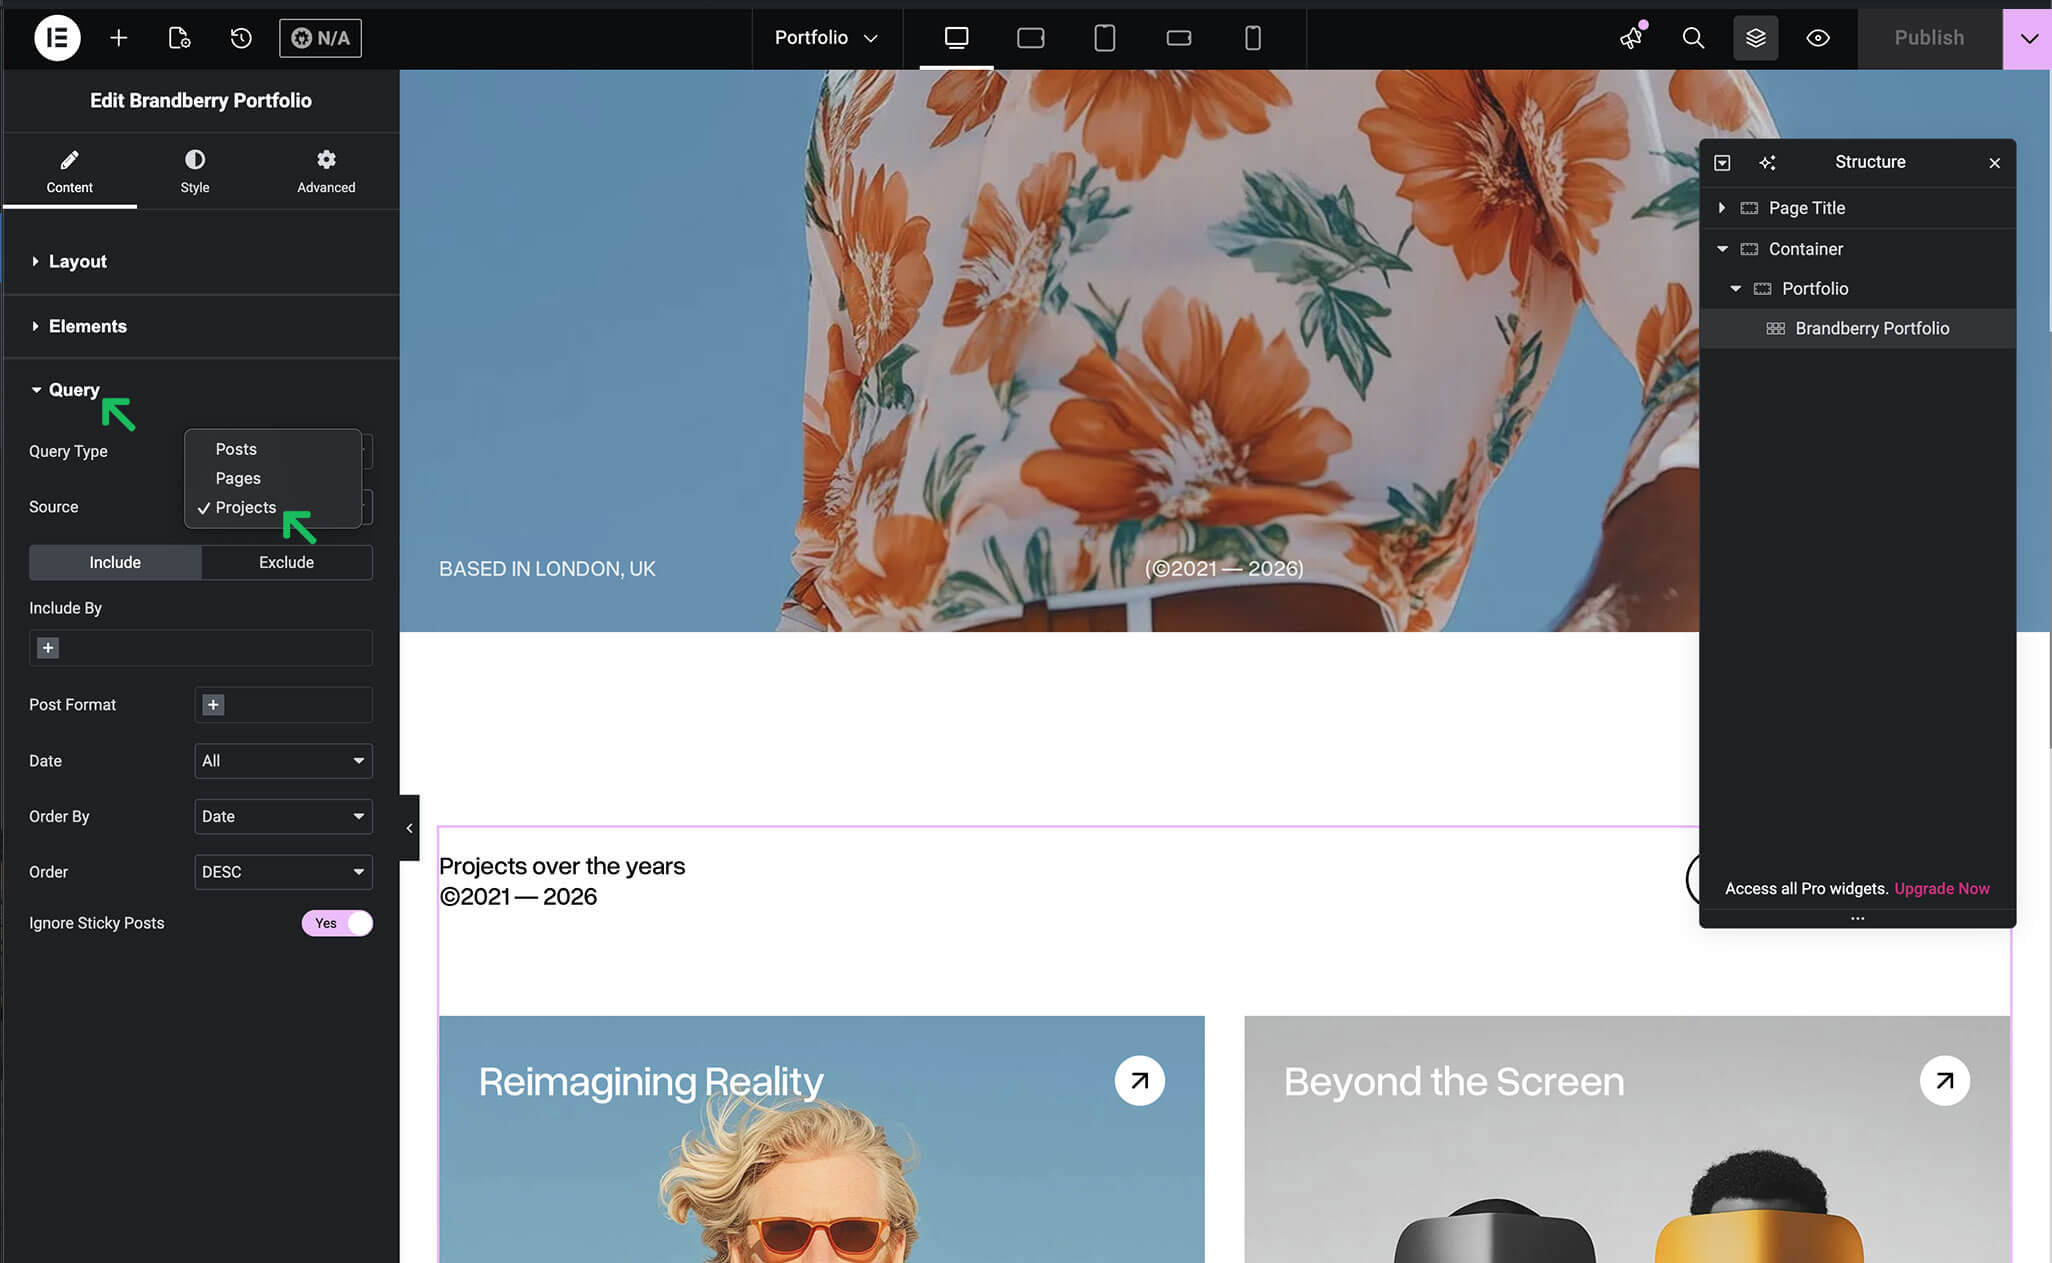
Brandberry’s Elementor widgets allow you to:
- Display posts dynamically
- Create grids, sliders, and lists
- Filter content using taxonomies
- Design custom layouts for each content type
Custom Taxonomies
In addition to custom post types, Brandberry allows you to create custom taxonomies, such as categories or tags, to better organize your content.
Custom Taxonomy Options
Each custom taxonomy includes the following settings:
- Taxonomy Name (Unique)
A unique internal identifier for the taxonomy. - Singular Name
The singular label (for example: Project Category). - Plural Name
The plural label displayed in the WordPress admin. - Front Slug
Defines the URL slug used for taxonomy archive pages. - Select Post Types
Assign the taxonomy to one or more custom post types. - Publicly Queryable
Allows taxonomy terms to be accessed on the frontend. - Show in Admin Menu
Displays the taxonomy in the WordPress admin menu. - Show in Navigation Menus
Allows taxonomy terms to be used in WordPress menus. - Show in UI
Enables the taxonomy interface in the WordPress admin. - Show in REST API
Enables REST API support for compatibility with editors and integrations.
Important After creating or modifying custom post types or taxonomies, we recommend refreshing permalinks by going to Settings → Permalinks and clicking Save Changes.
